

Photoshop How To Change All Of One Color To Another
Photoshop colour change: 2 tools you need to know

In this tutorial you'll learn two of the most basic techniques for making colour changes to selected areas of an image in Photoshop. From the quickest approaches with the Color Replacement tool, to the slightly more advanced techniques of using the Color Range command, these tips have you covered.
We'll also talk you through the tools and panels to give you a good understanding of what they do and how to get the most out of them. Not only that, you'll pick up handy Photoshop shortcuts along the way.
As we mentioned, this tutorial covers the most basic Photoshop colour change tools, the Color Replacement tool and the Color Range command. If you know which one you'd like to explore, simply click on the above links to jump to the relevant sections in this article.
Photoshop has many different ways of doing things, but this tutorial is a great starting point that will give you the basic information you need to get started with making a Photoshop colour change – if you'd like more Photoshop help, check out our roundup of the best Photoshop tutorials.
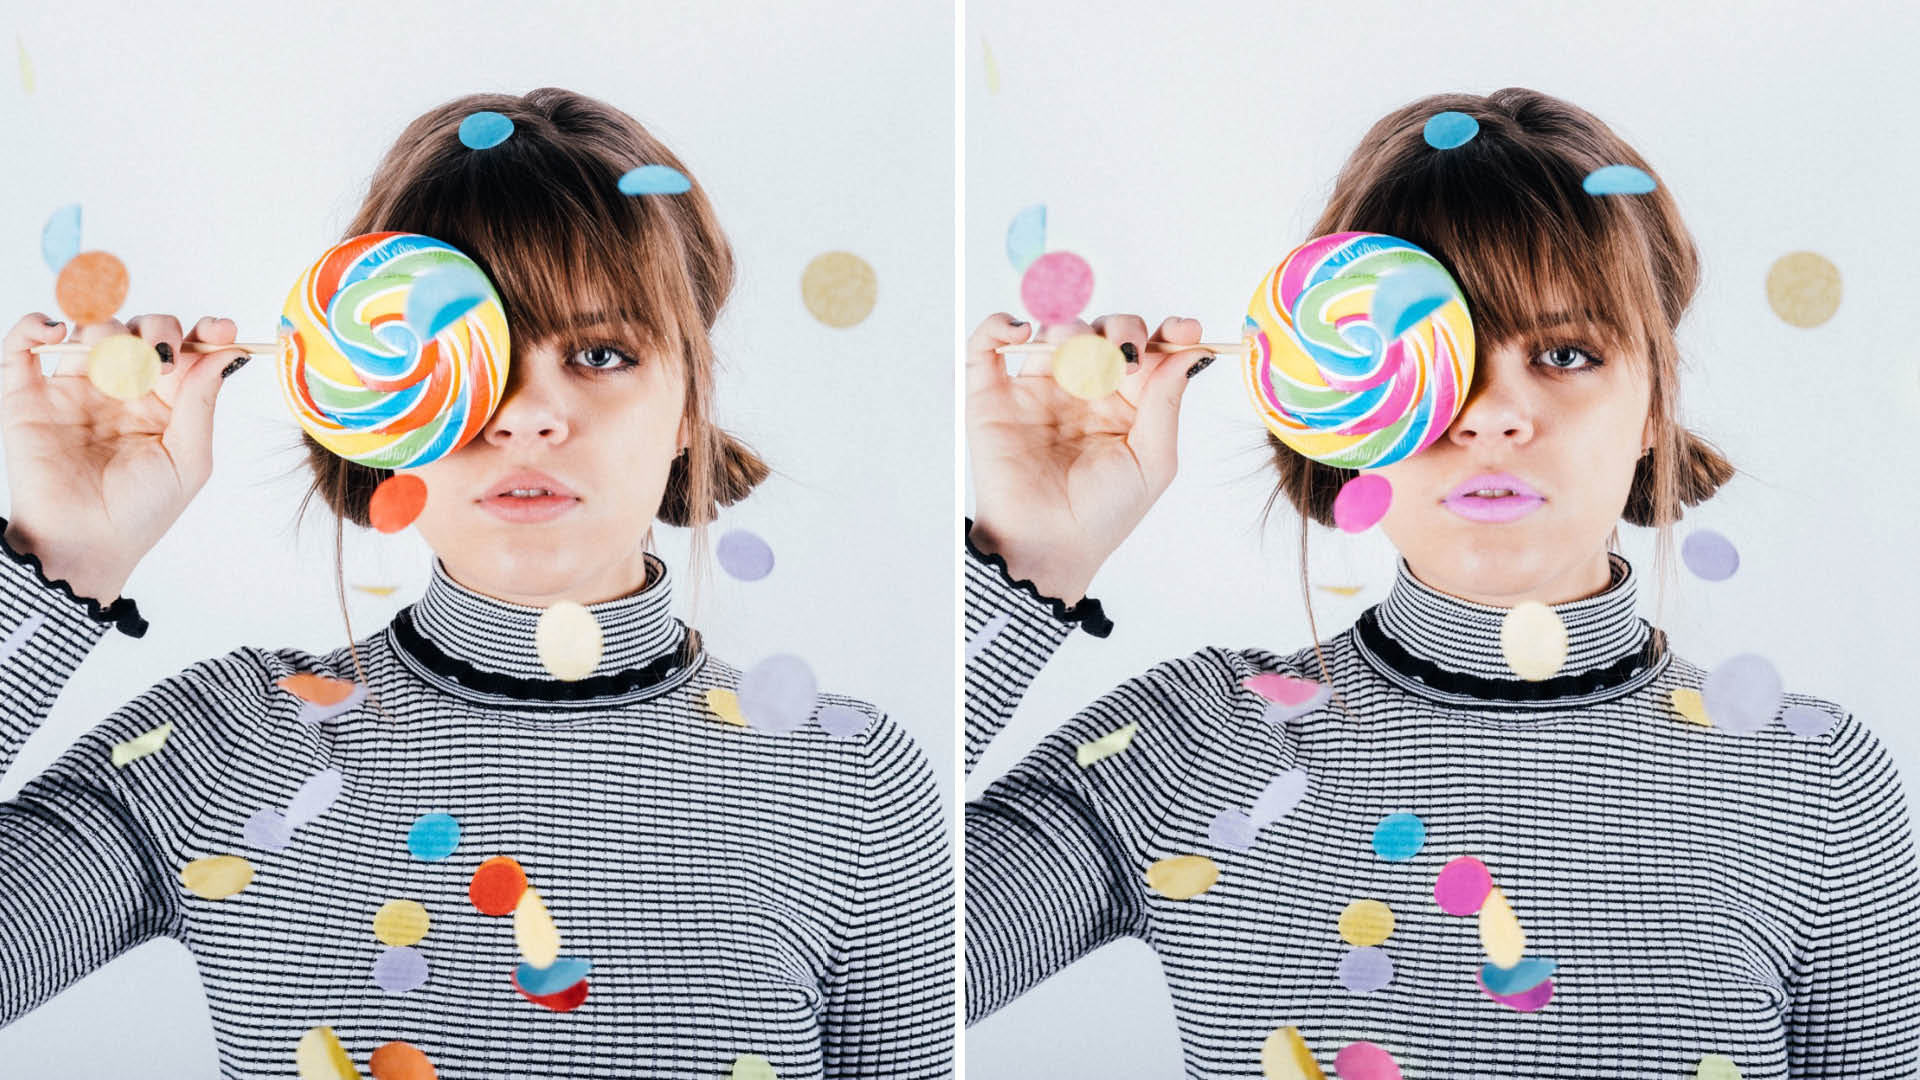
To follow along using the images used in this tutorial, download the following: Image of lady by Noah Buscher , macaroons photo by Eaters Collective , both from Unsplash.
The Color Replacement tool
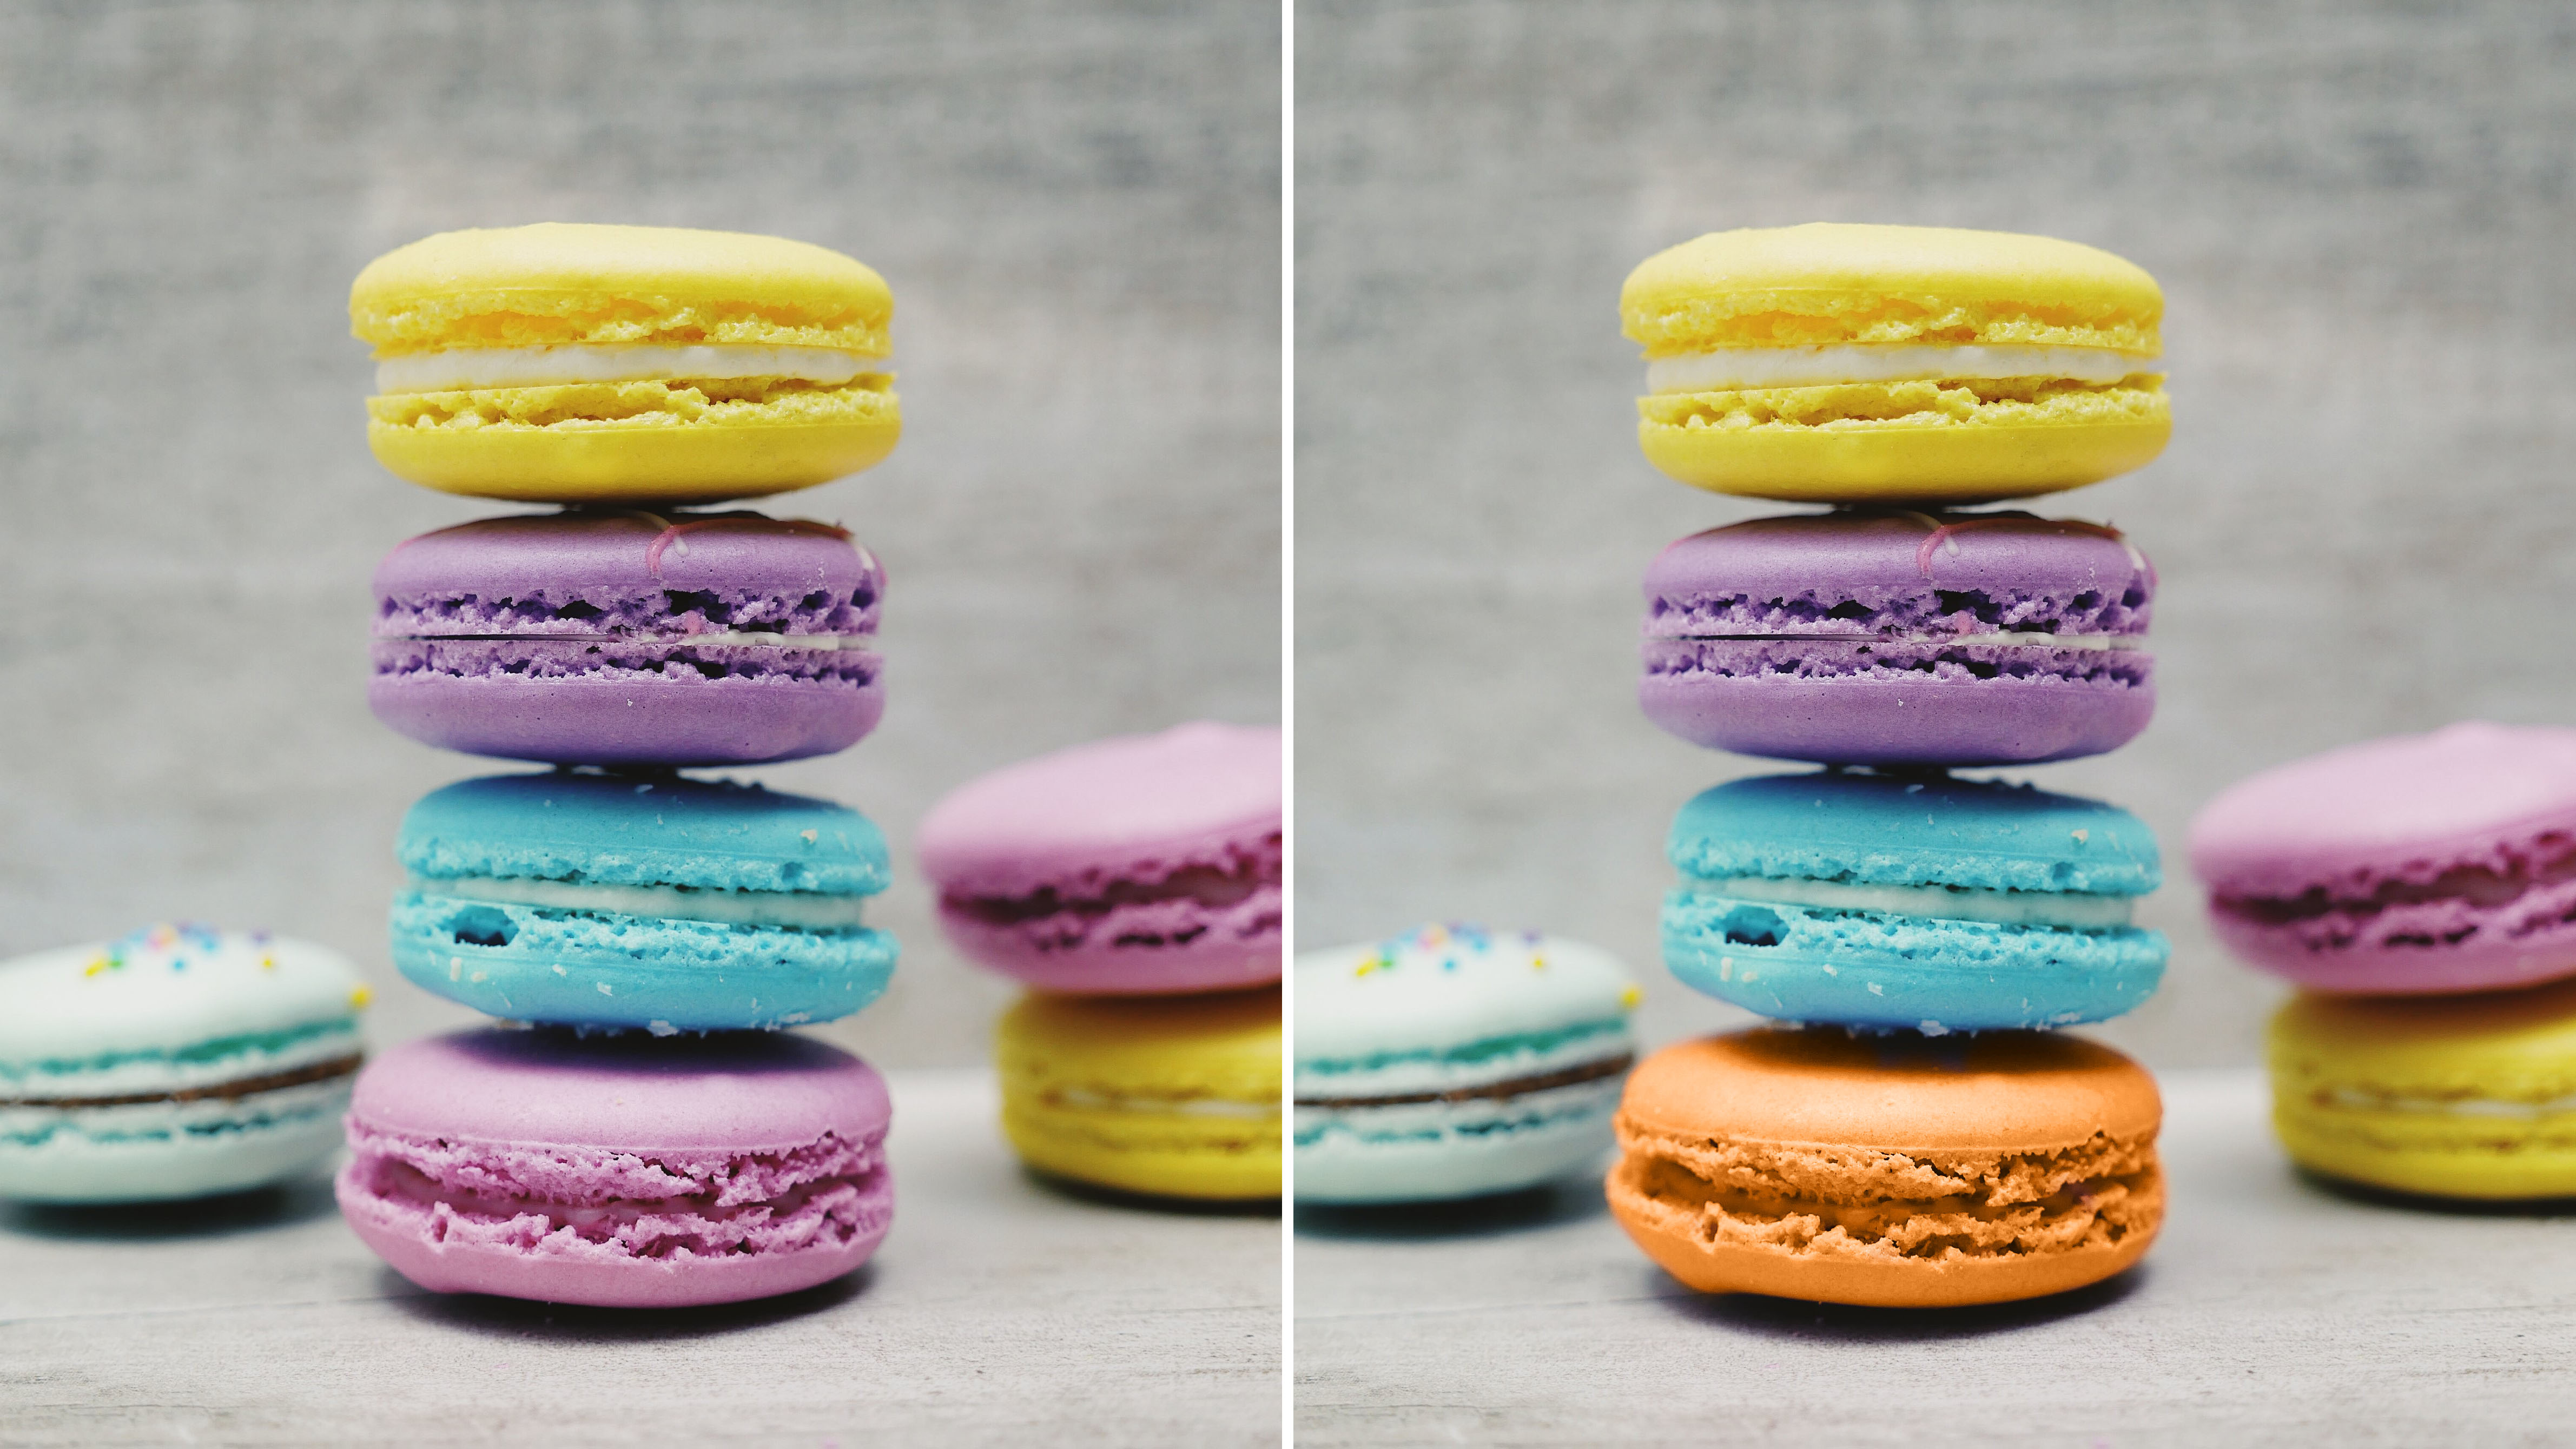
The Color Replacement tool is the quickest way to make a colour change in Photoshop. It works by sampling the original colours and replacing them with your selected foreground colour.
The great thing about the Color Replacement tool is that it maintains the midtones, shadows, and highlights of the original image so you get a realistic-looking colour adjustment. On the downside, it's destructive. Any changes you make will permanently adjust the pixels in your image. Unless you undo them, that is.
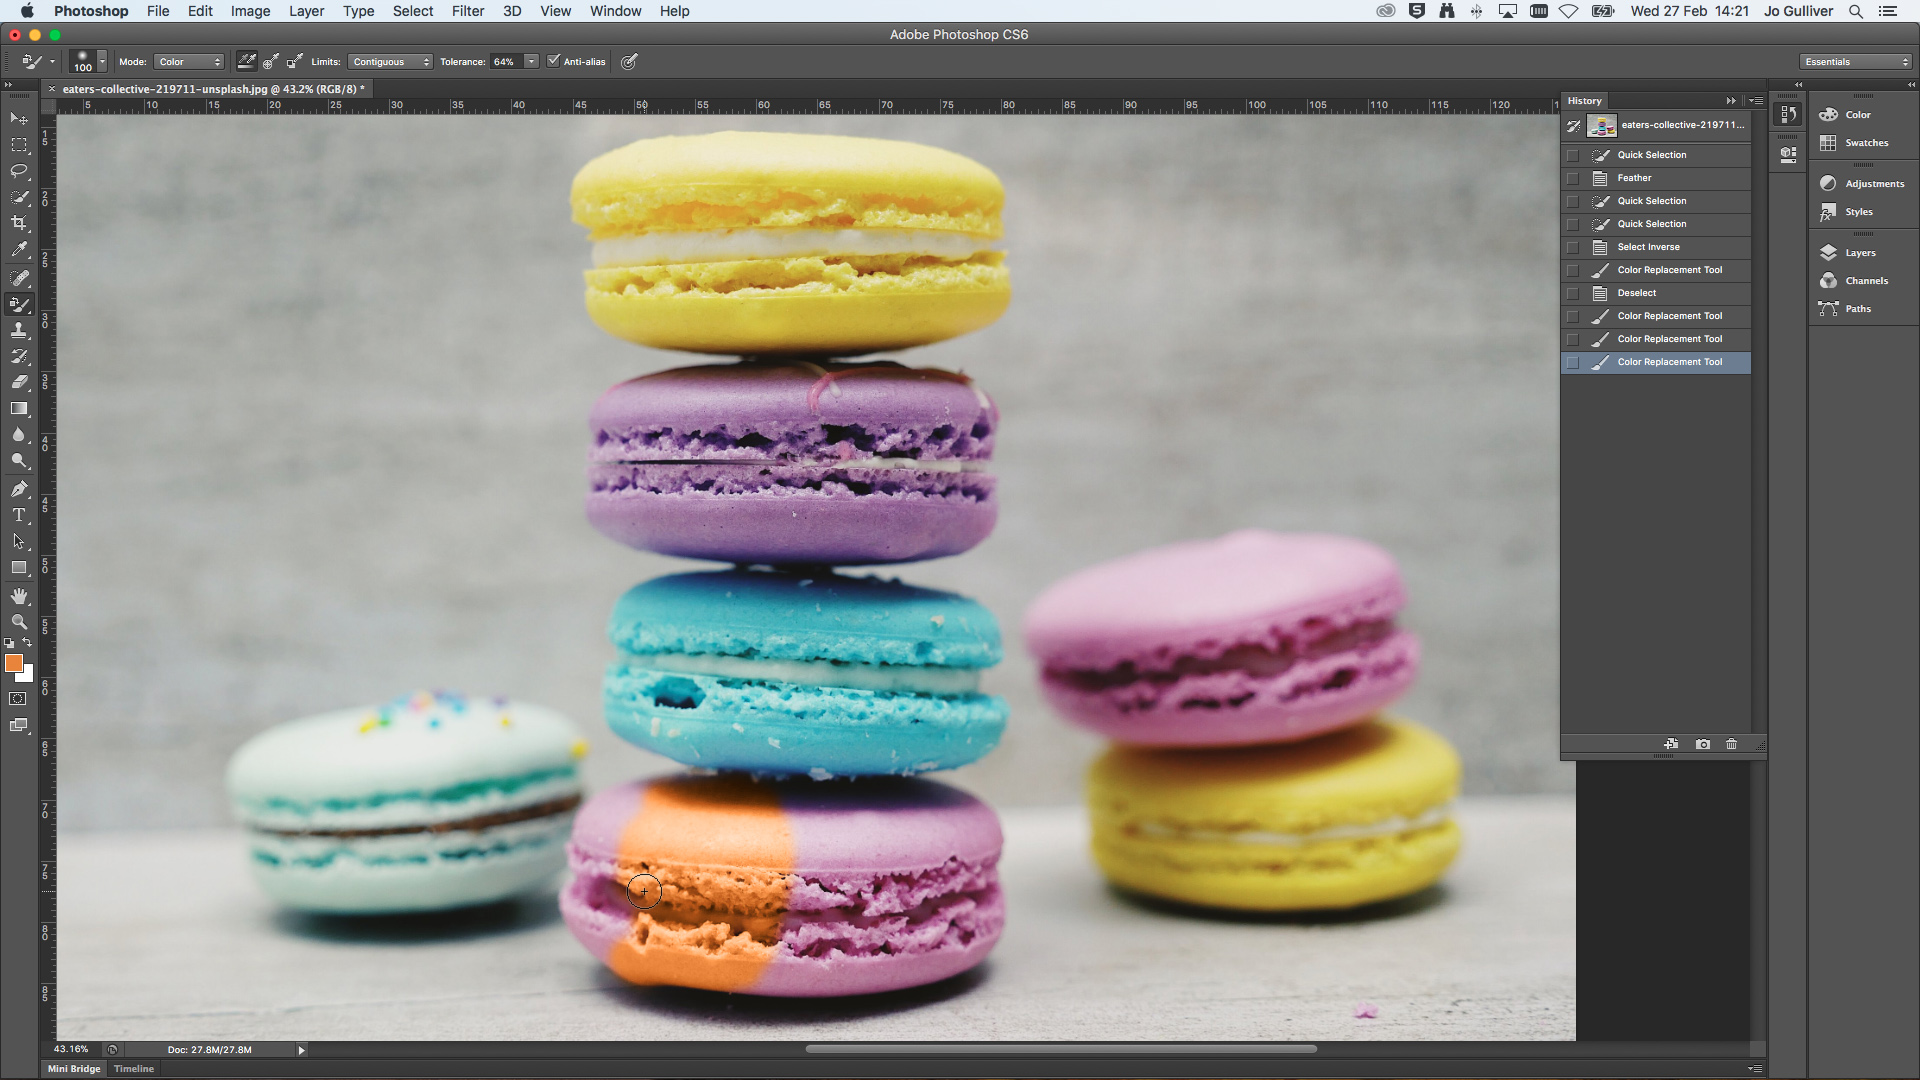
The Color Replacement tool can be found under the flyout menu of the Brush Tool in the Tools panel (for PhotoshopCS - CS2 users, you'll find it in the flyout menu of the Healing Brush). Simply right-click (Control-click) on the Brush Tool to select the Color Replacement Tool.
Alternatively, press B to select brushes. Then use the shortcut Shift + B to toggle through the different brush options until you select the Color Replacement tool.
- Get Adobe Creative Cloud here

With your image open, the first thing you want to do is select your replacement colour and add this as your foreground colour. To do this, click on your foreground colour box and select the colour you wish to use. Then have a look at the original colour you want to replace.
For a realistic look, you will want to select something that has a similar luminosity. You don't want to go too bright or too dark as the change will look obvious. With the Color Replacement tool selected, you can start making the colour change by painting over your chosen area in your image.
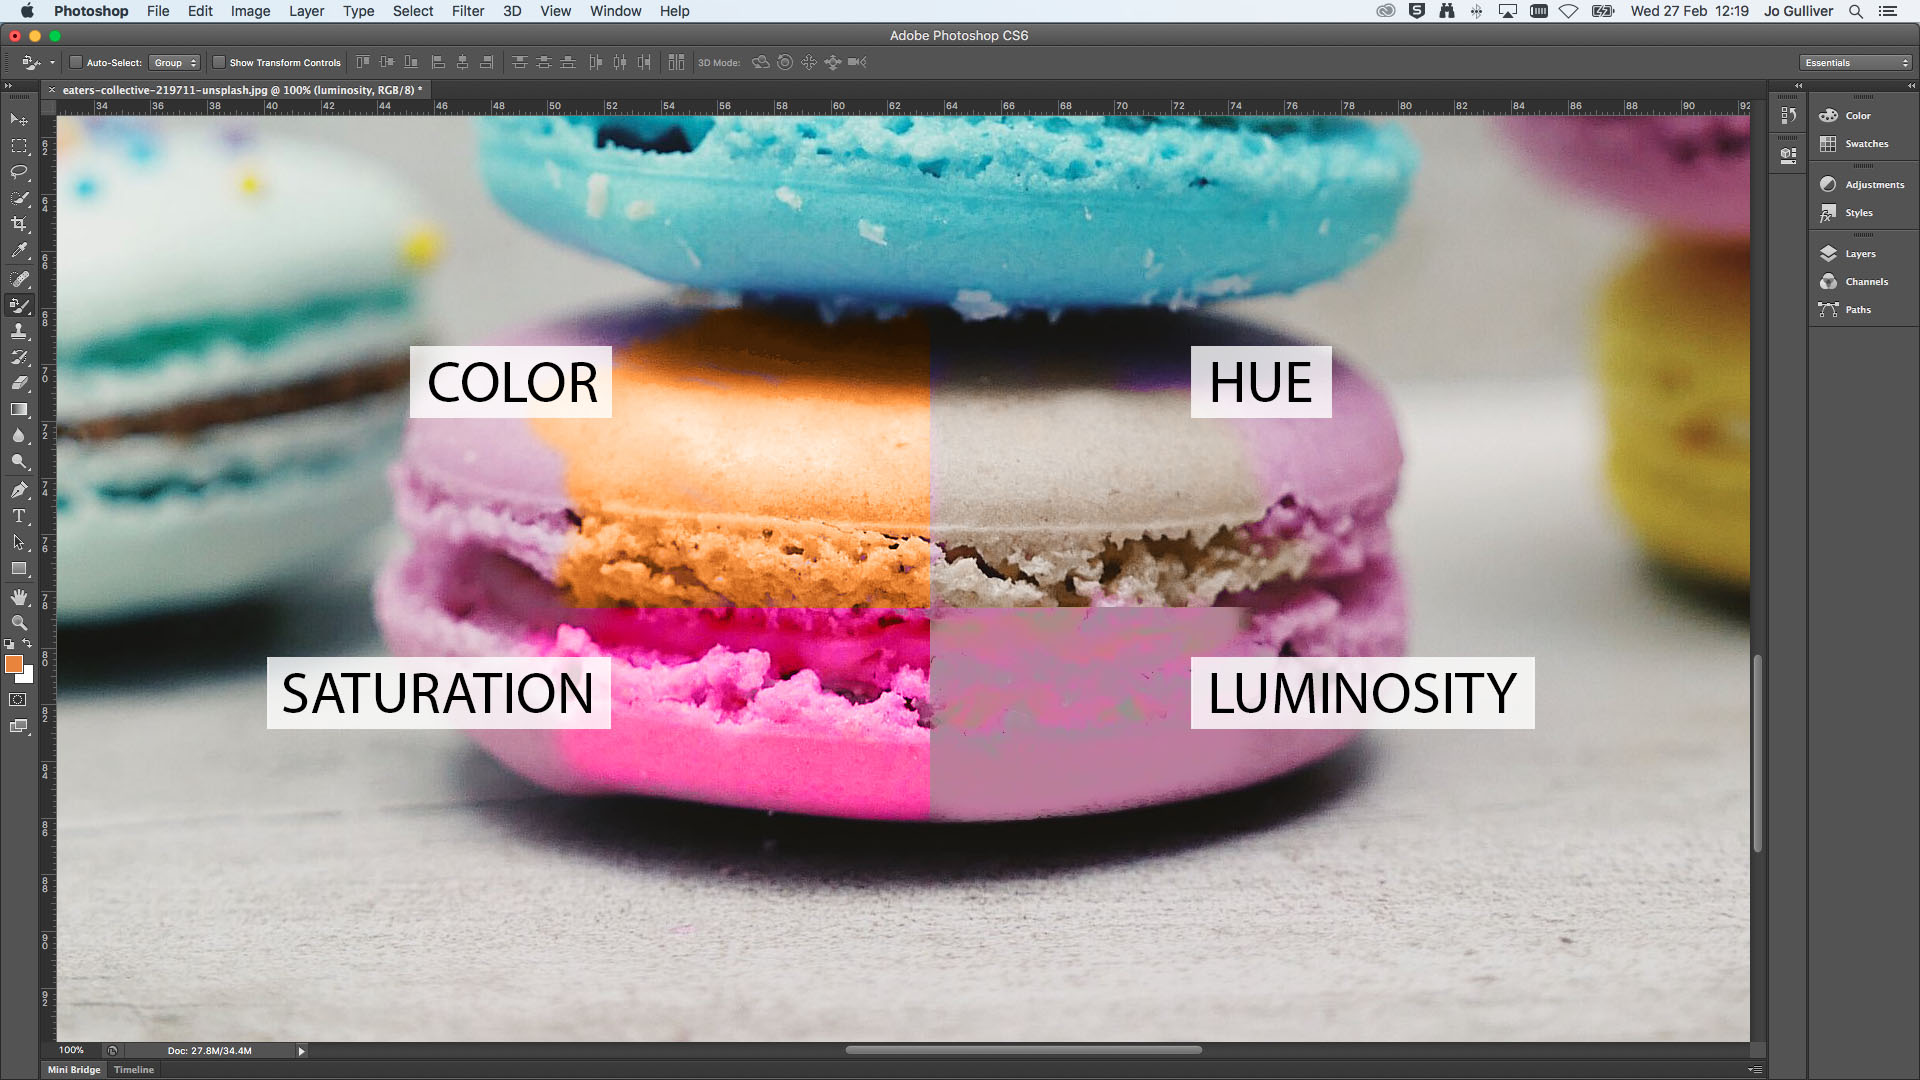
Just like any other brush tool, you can make adjustments to the functionality of the Color Replacement tool. This includes the ability to tweak the size, hardness and spacing of the brush. Just head to the flyout menu found in the Control Panel. Here you'll also find the option to make additional adjustments to the mode, hue, saturation, sampling methods, limits and tolerance.
By default, the mode will be set as colour, which as you'd expect is the best option for adjusting the colour of an image. Hue will give you a similar colour to your selected foreground colour. Depending on what you are recolouring, the colour might appear more muted or more intense.
Saturation will more often than not increase the intensity of your colour. Meanwhile, luminosity does the opposite and desaturates the selection and is generally best avoided when working with the Color Replacement tool as the results are not great. If you want to explore this tool, you're best off experimenting to see the results you get with the different mode settings.
The sampling options, which include Continuous, Once and Background, are the icons between the mode and limits menus. They are set to Continuous by default. As the name suggests, the continuous option samples and replaces the colour continuously while you move the mouse. By choosing Once, you will be only be able to replace the colour sampled in your first selection. Finally, background replaces the colour only in the areas containing your background colour.
Limits, which is set to Continuous by default, replaces the pixels and adjoining pixels within the brush area. Meanwhile, Discontinuous replaces the colour of the pixels of the foreground colour within the brush area whether they are adjacent or not. Find Edges will replace the colour while maintaining the edges of the objects. It works best when there is a defined line, if the focus is soft or blurred you will not get as good a result. In this case, you're better off switching to a softer brush and sticking with Continuous.
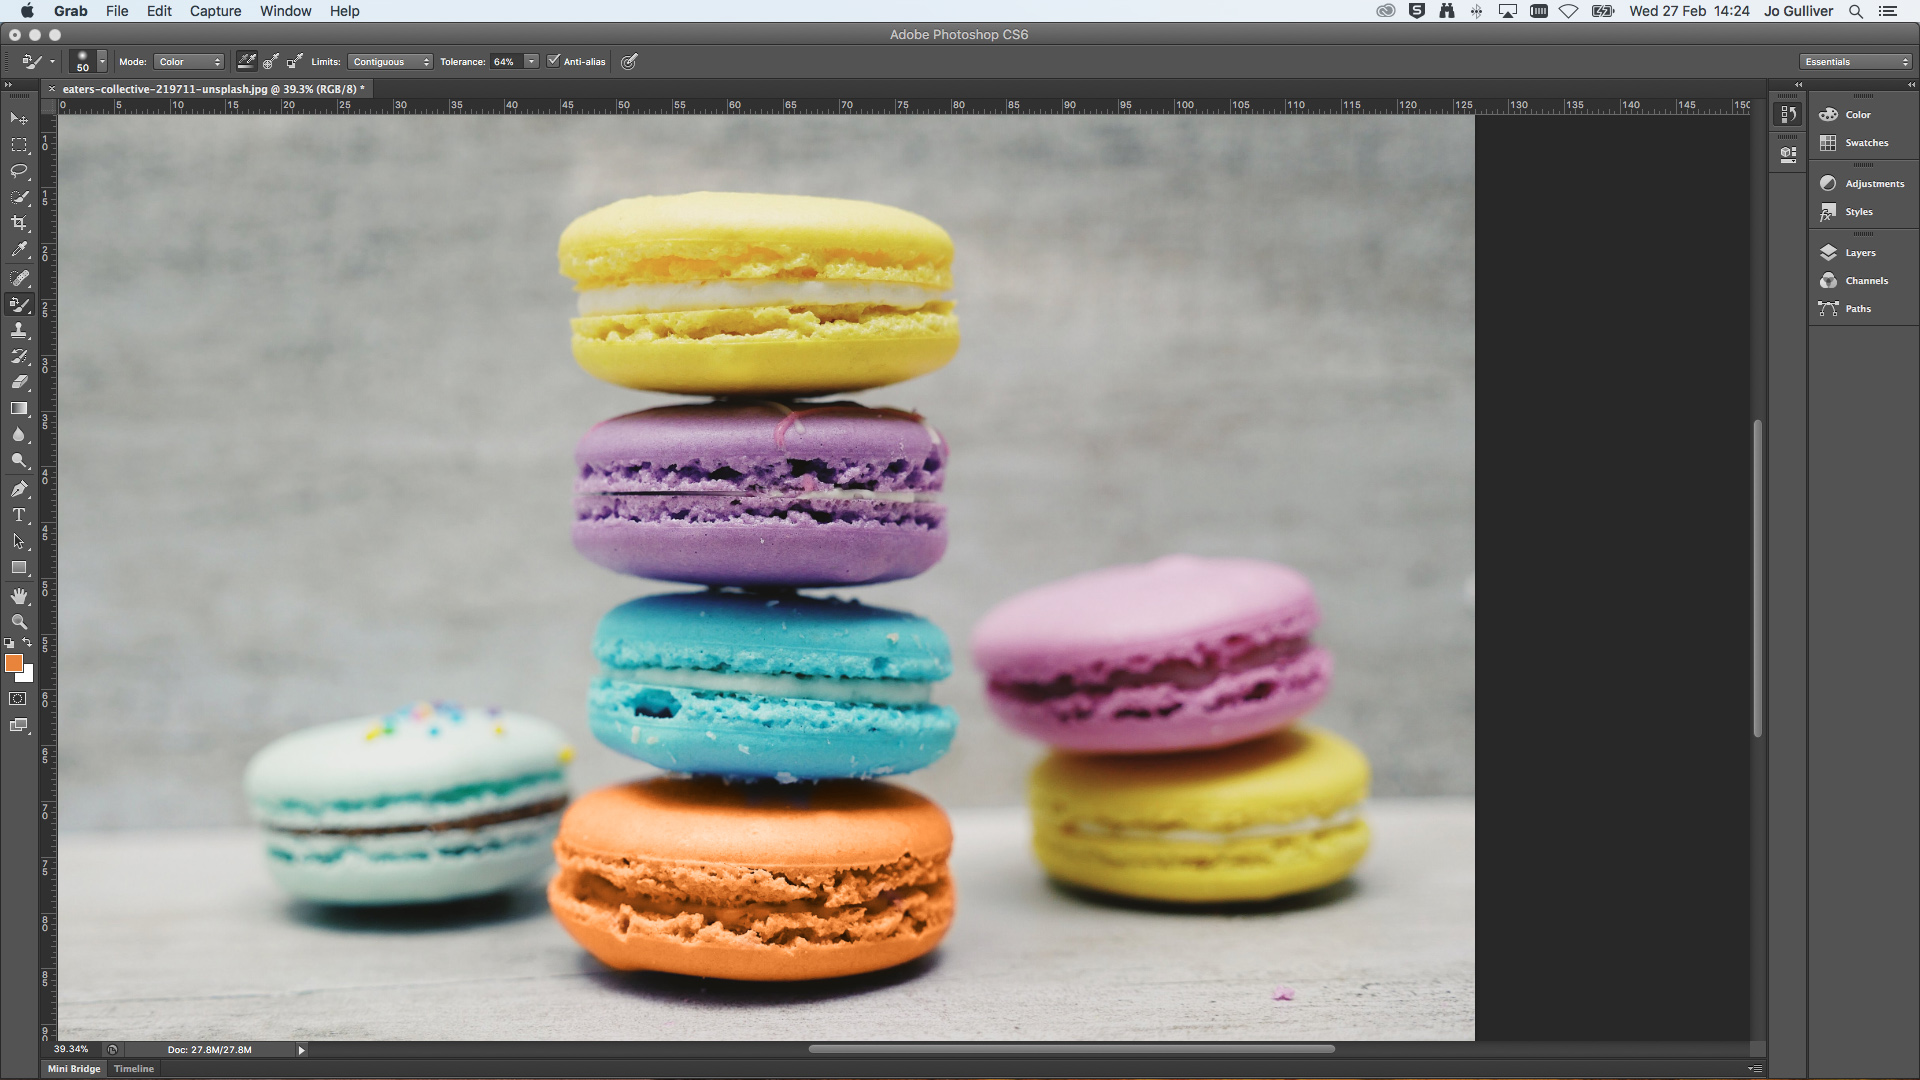
The Tolerance slider is used to control how similar a pixel colour needs to be to the sampled foreground colour. Reduce the tolerance to select only colours that are close to your sampled colour, or increase for a wider selection. And finally, you can choose to add anti-aliasing to smooth out jagged edges.
The Color Range command
The Color Range command
If you want more flexibility and a non-destructive method to manipulating colours in Photoshop, the Color Range command is the option for you. It works in a similar way to the Magic Wand tool by making a selection based on colour and tonal values. For a quick look at how to use the magic wand tool, check out our how to remove a background in photoshop walkthrough.
Unlike the Magic Wand tool, the Color Range command allows you to select specific colours throughout your whole image, or a pre-existing selection, instead of just the pixels adjacent to your selection point.
You have a great deal of control with this command too as there are multiple options for making selections. From using the colour picker, to the predefined colour range of CMYK and RGB, to the tonal selection of highlights, midtones and shadows and skin tones and out a gamut.
How to use the Color Range command
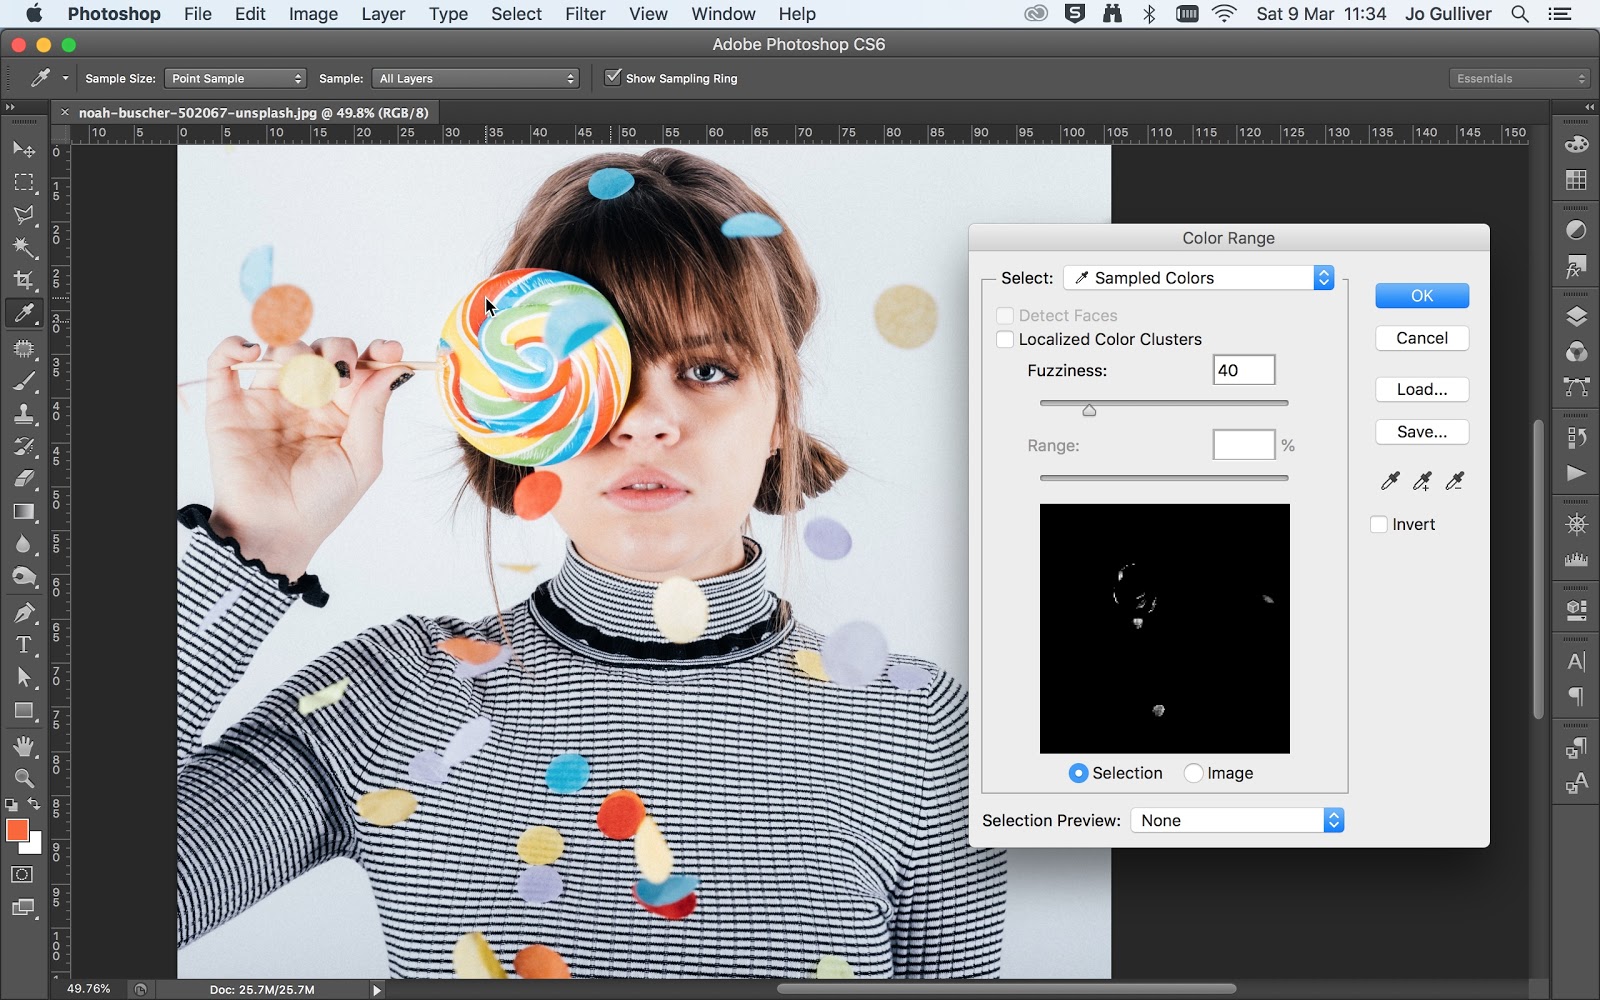
The Color Range command is found under the Select menu in the Menu Bar. With the image you wish to work on already open, select Color Range… to open the Color Range dialogue box. To get started, we are going to look at the default selection of the sampled colour.
With the sampled colour showing in the select drop-down menu, use the Eyedropper tool to select a colour from your image. You can use the Eyedropper on your main image or within the image frame inside the panel. This function is pretty self-explanatory, simply select different colours from within your image and they will appear in the selected colour range in the dialogue box window.
Color Range: Refine the selection
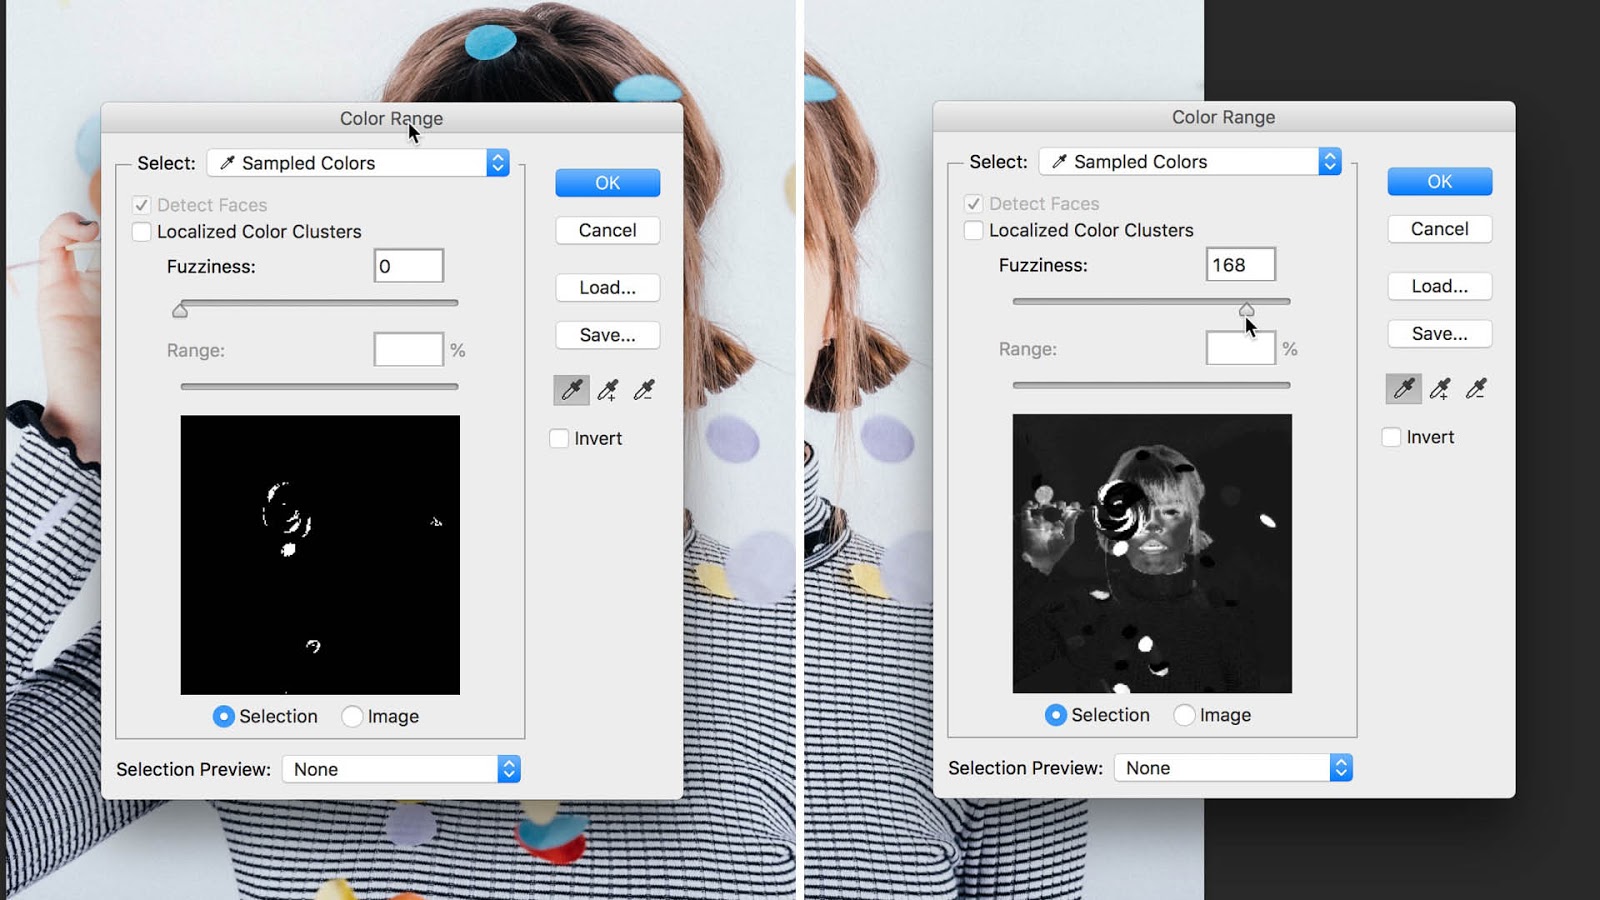
You might find that the Eyedropper isn't picking up all the different tones of your chosen colour. That's because the Eyedropper will select all of the pixels that are the exact same colour as the pixels selected, plus all of the pixels that are within a particular brightness value.
By adjusting the Fuzziness level you can control the range of colours selected. The tool is set to 40 by default. By increasing the value you extend the selection of the colour range, while decreasing the Fuzziness reduces it.
In addition to this, you also have the option to use the Add to Sample Tool and the Subtract to Sample Tool. Appearing as an Eyedropper in the Color Range dialogue box, the Add to Sample icon is accompanied by plus symbol, while the Subtract to Sample icon is accompanied by a minus symbol. Use the shortcut with the Eyedropper tool, shift to add, alt/opt to subtract.
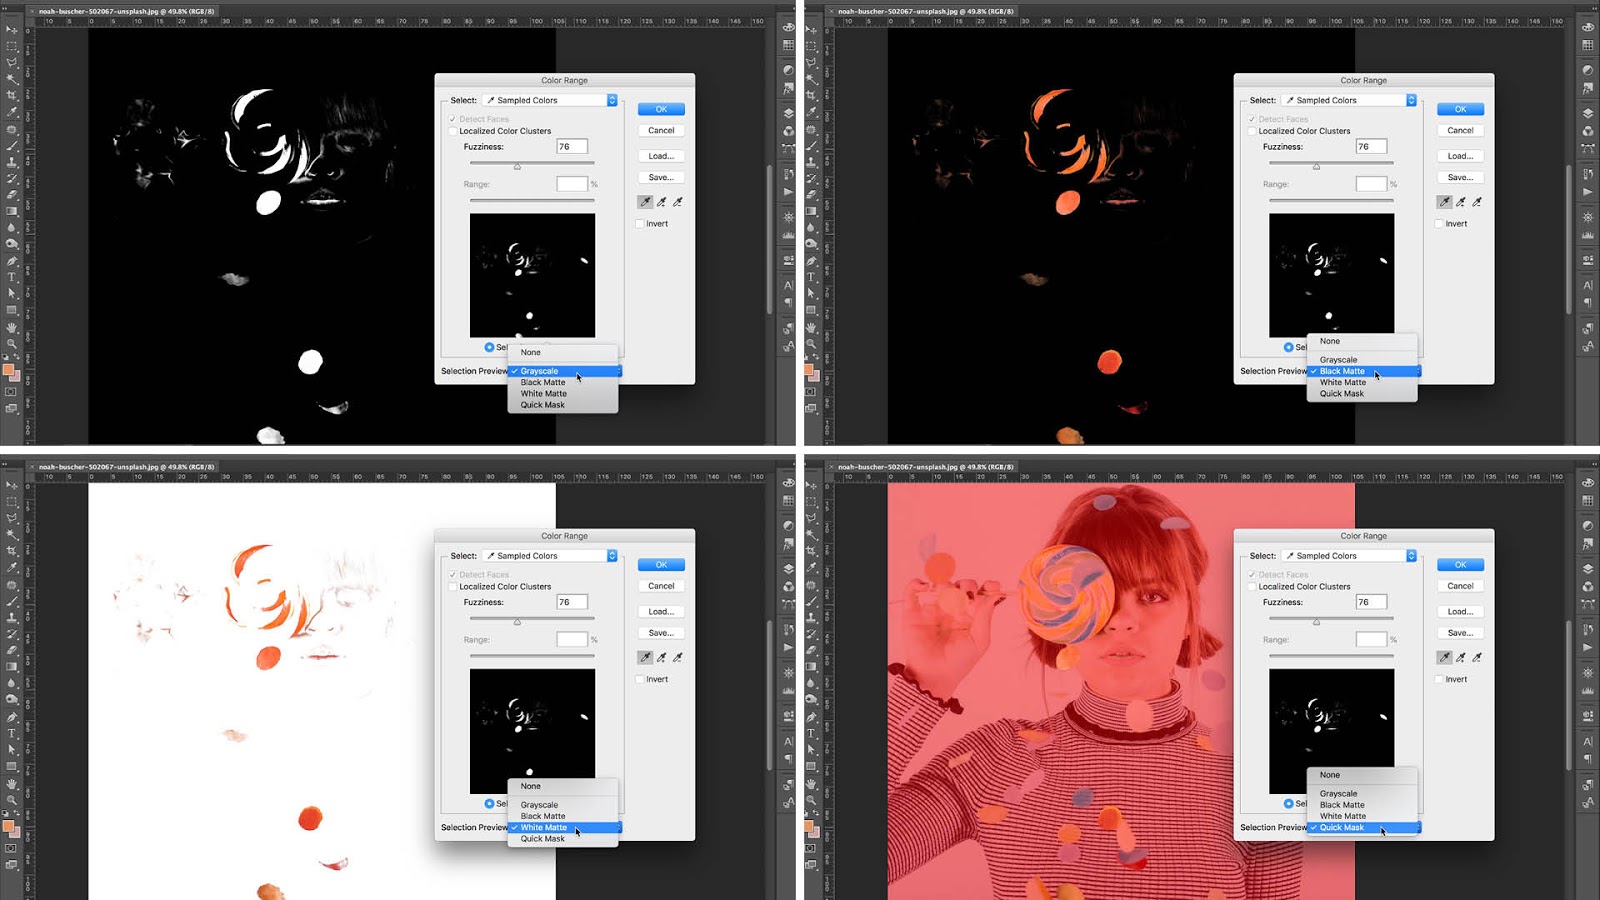
With your colour range selection active you can toggle through the Selection Previews in the drop down menu. This will show your selection in different view modes on your main canvas, giving you a clearer picture of your colour selection.
Your selection isn't going to be perfect, so you may have areas missing or unwanted parts of your image included in your selection. Don't worry too much at this point though as we can perfect your selection later. Once you are happy with your selection, go ahead and hit the ok button.
Color Range: Activate Localized Color Clusters
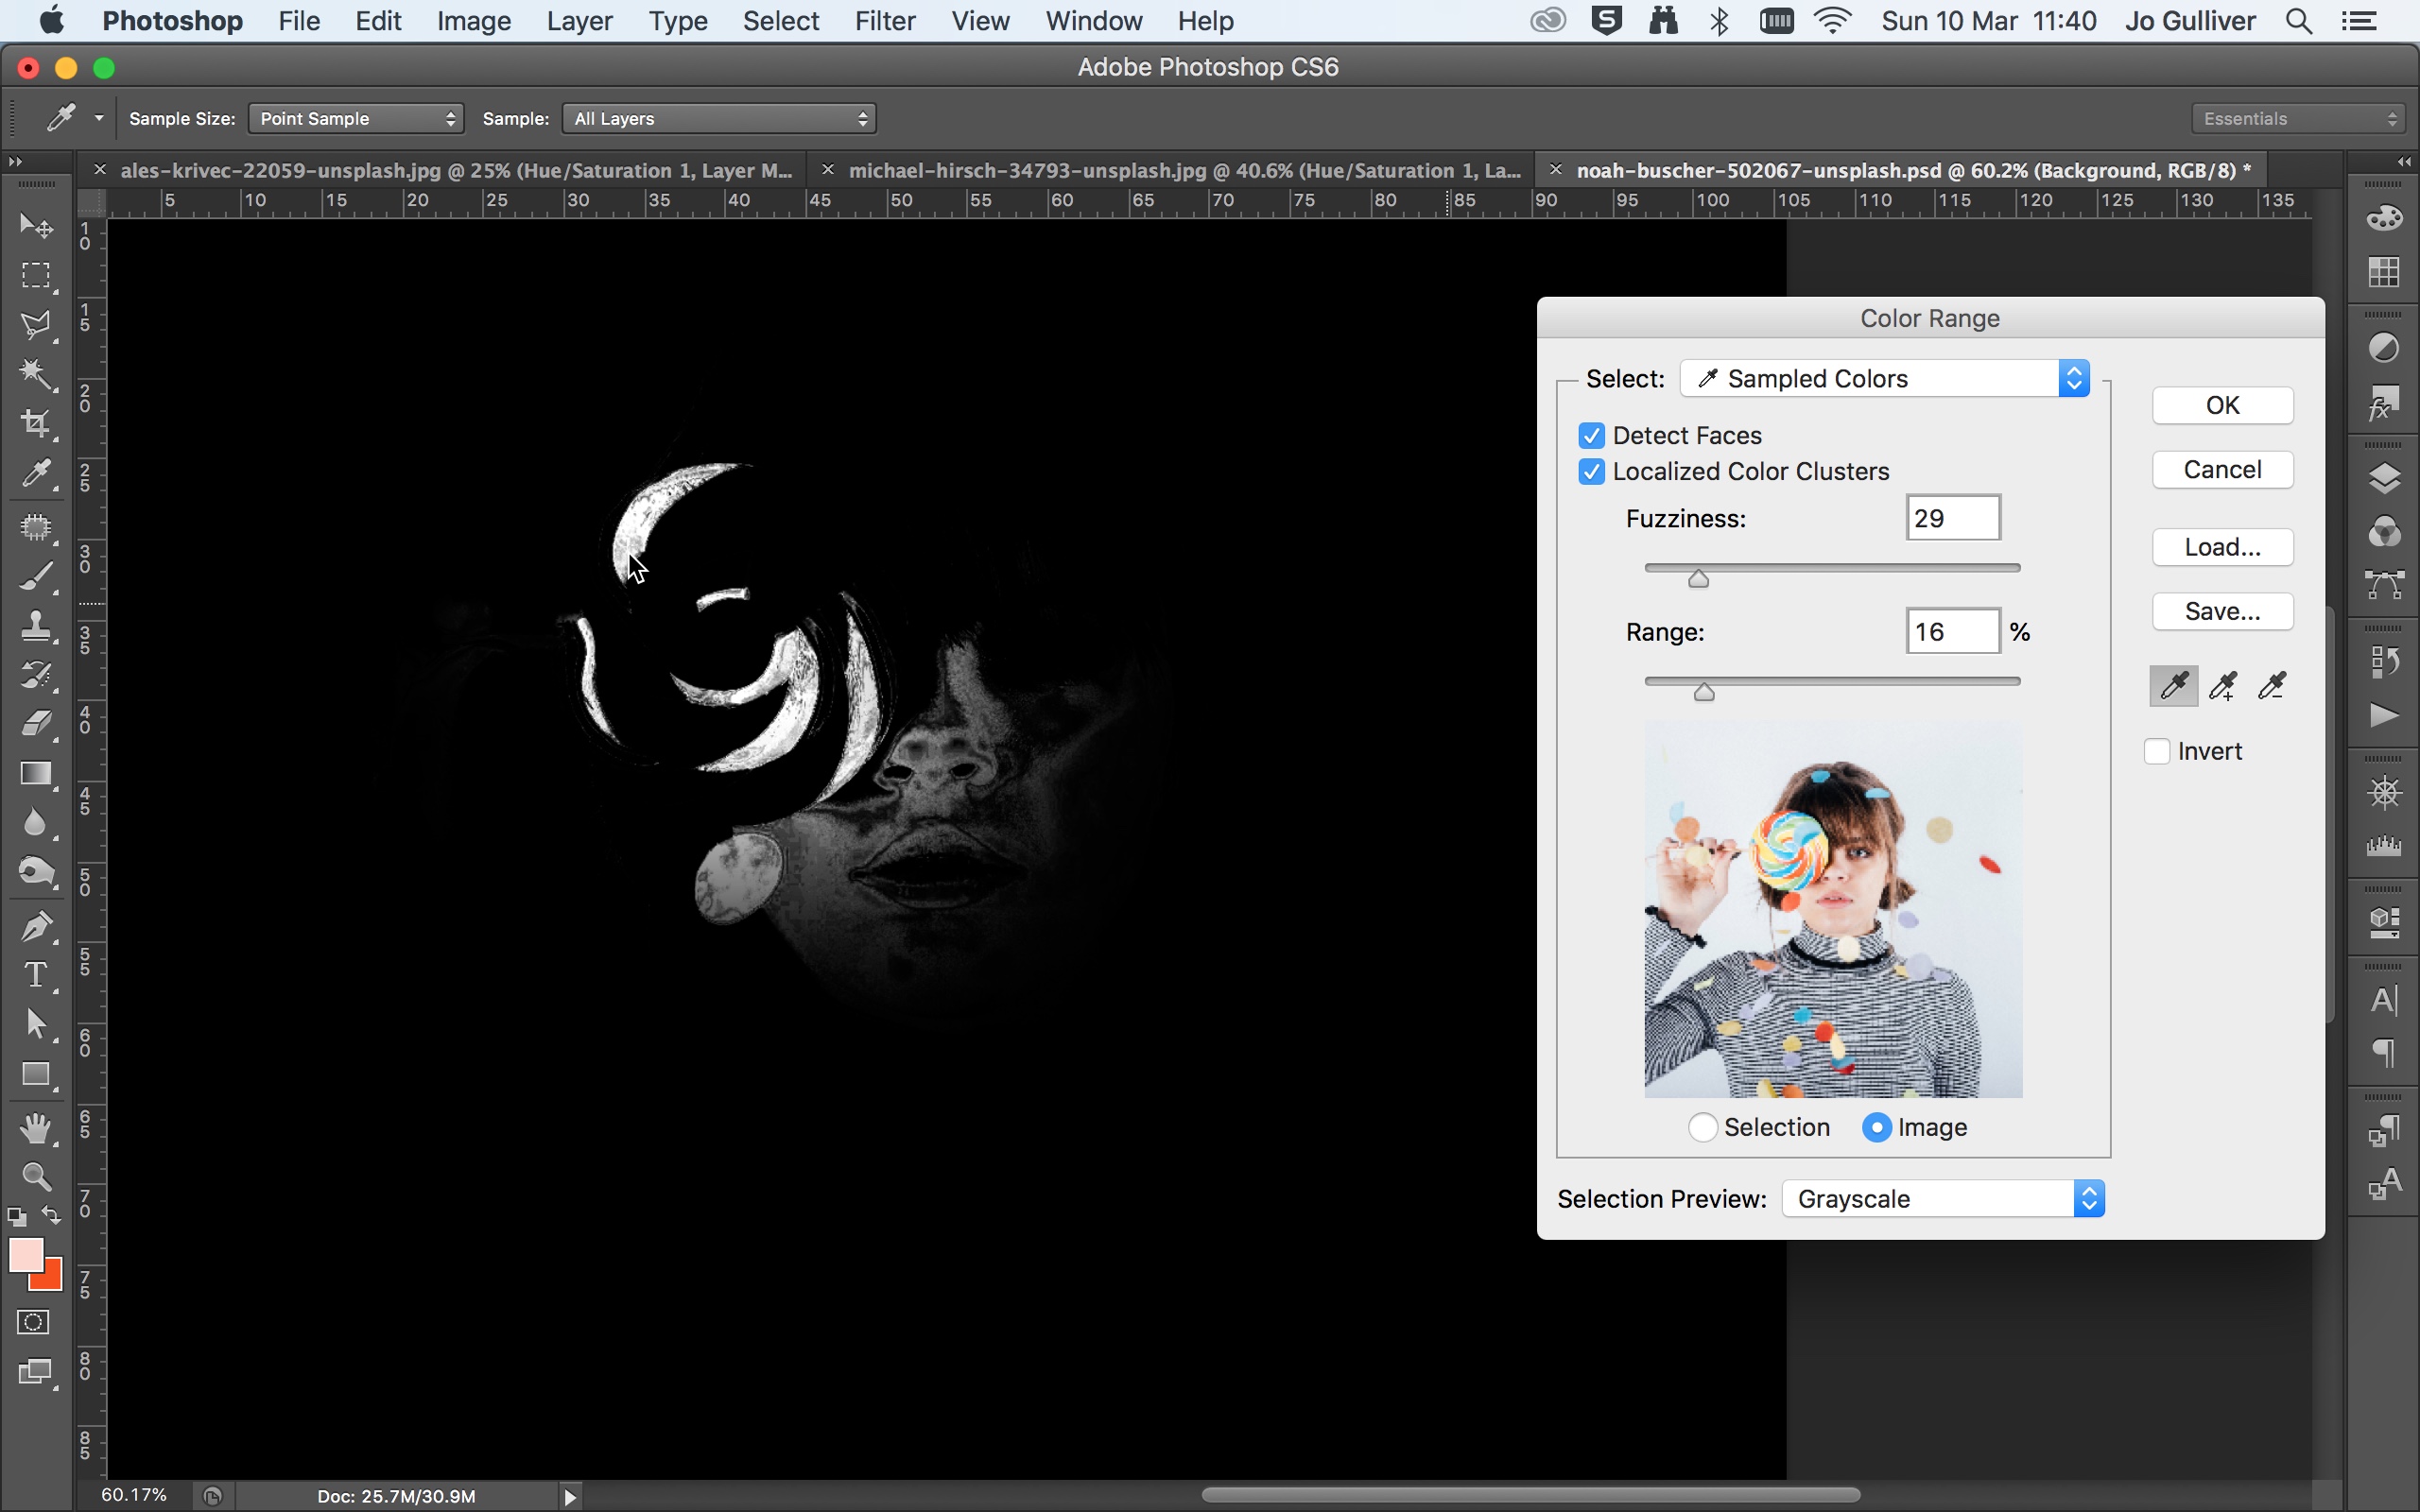
If you want your selection to focus on particular area of an image, you can activate the Localized Color Clusters – available in CS4 and higher.
With this selected, the previously greyed out Range slider becomes active. By reducing the Range, Photoshop will localise its selection to the points closest to the areas you selected with your Eyedropper tool. In this case, we're not going to use this as we want to select all instances of the foreground colour in our picture.
Color Range: Add Adjustment Layers
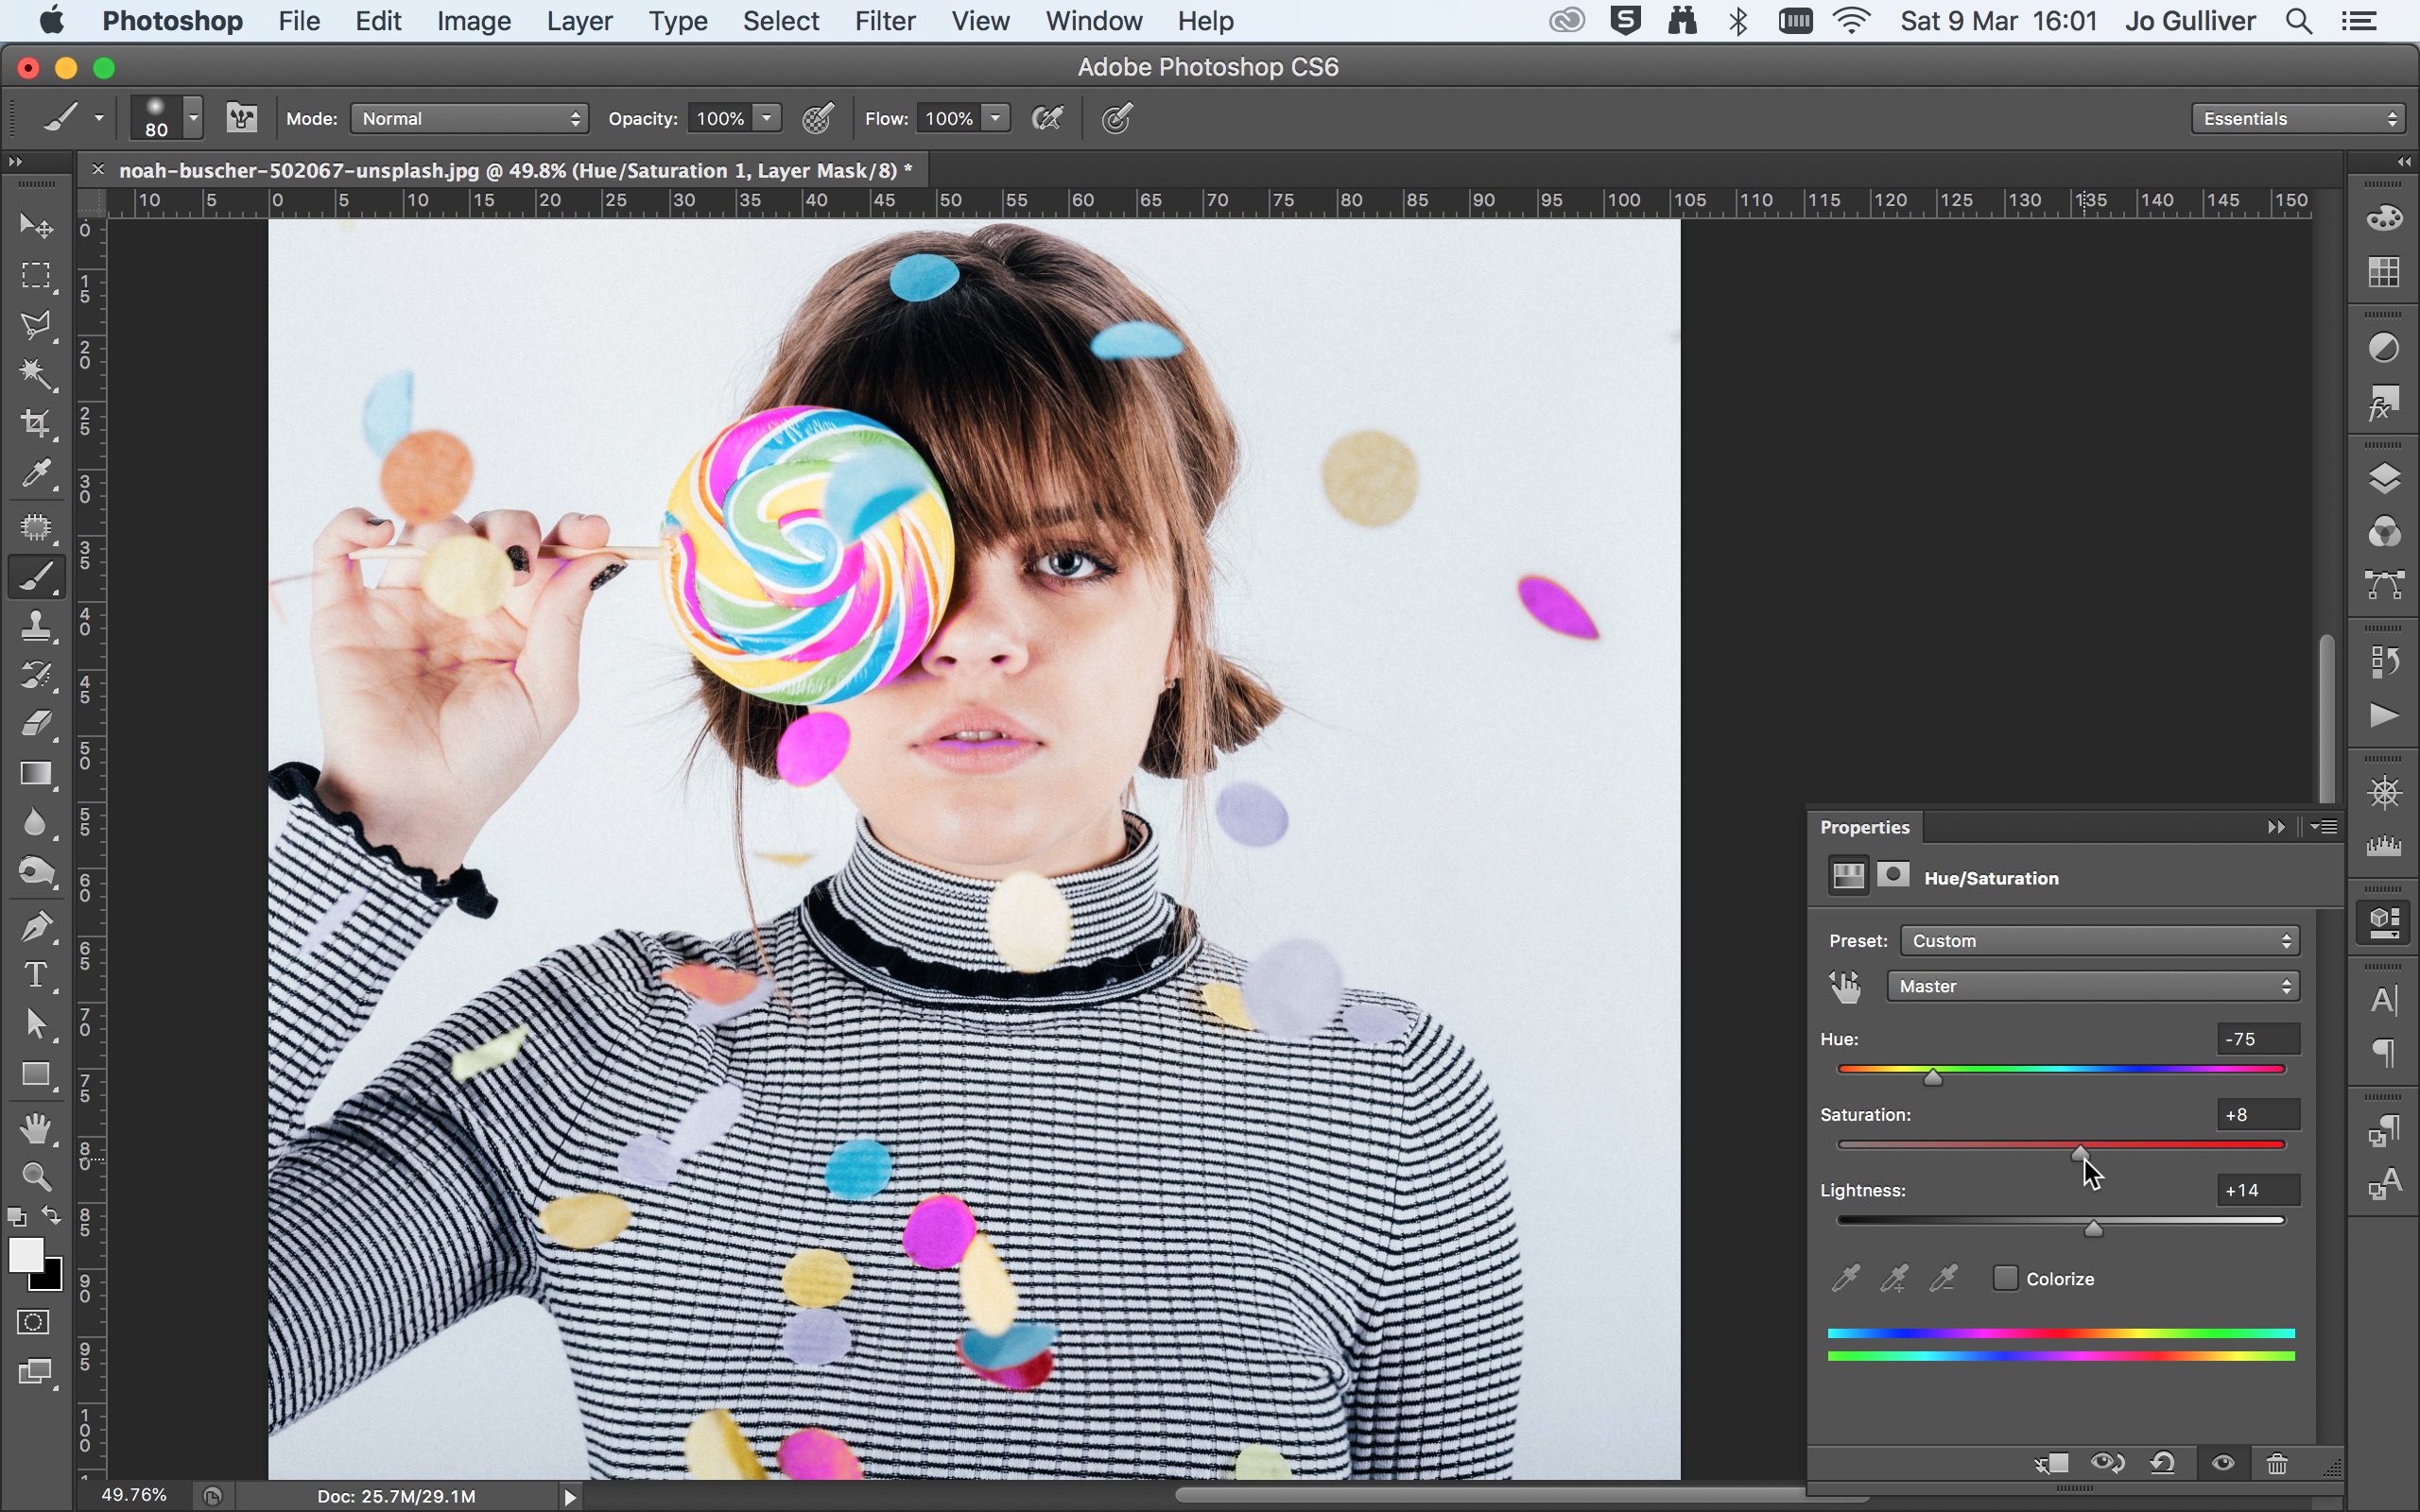
With your selection made and active you now want to add a new Adjustment Layer. This is how you are going to change the colours in your image. Go to Layers > New Adjustment Layer > Hue/Saturation, or use the shortcut button at the bottom of the Layers panel.
Name your layer and click OK. This will add an Adjustment Layer (visible in your layers panel) and open the Hue/Saturation Properties panel. Inside the Properties panel, you will see a number of sliders: Hue, Saturation and Lightness. Adjust the Hue slider to change the colour of the selection.
The Saturation slider controls the intensity of the colour, while the lightness slider controls the brightness and darkness. As you adjust the slider the colours will change in the bottom coloured bar. The first bar shows the original colour, and the second bar displays the adjustments you made.
Color Range: Finesse your selection
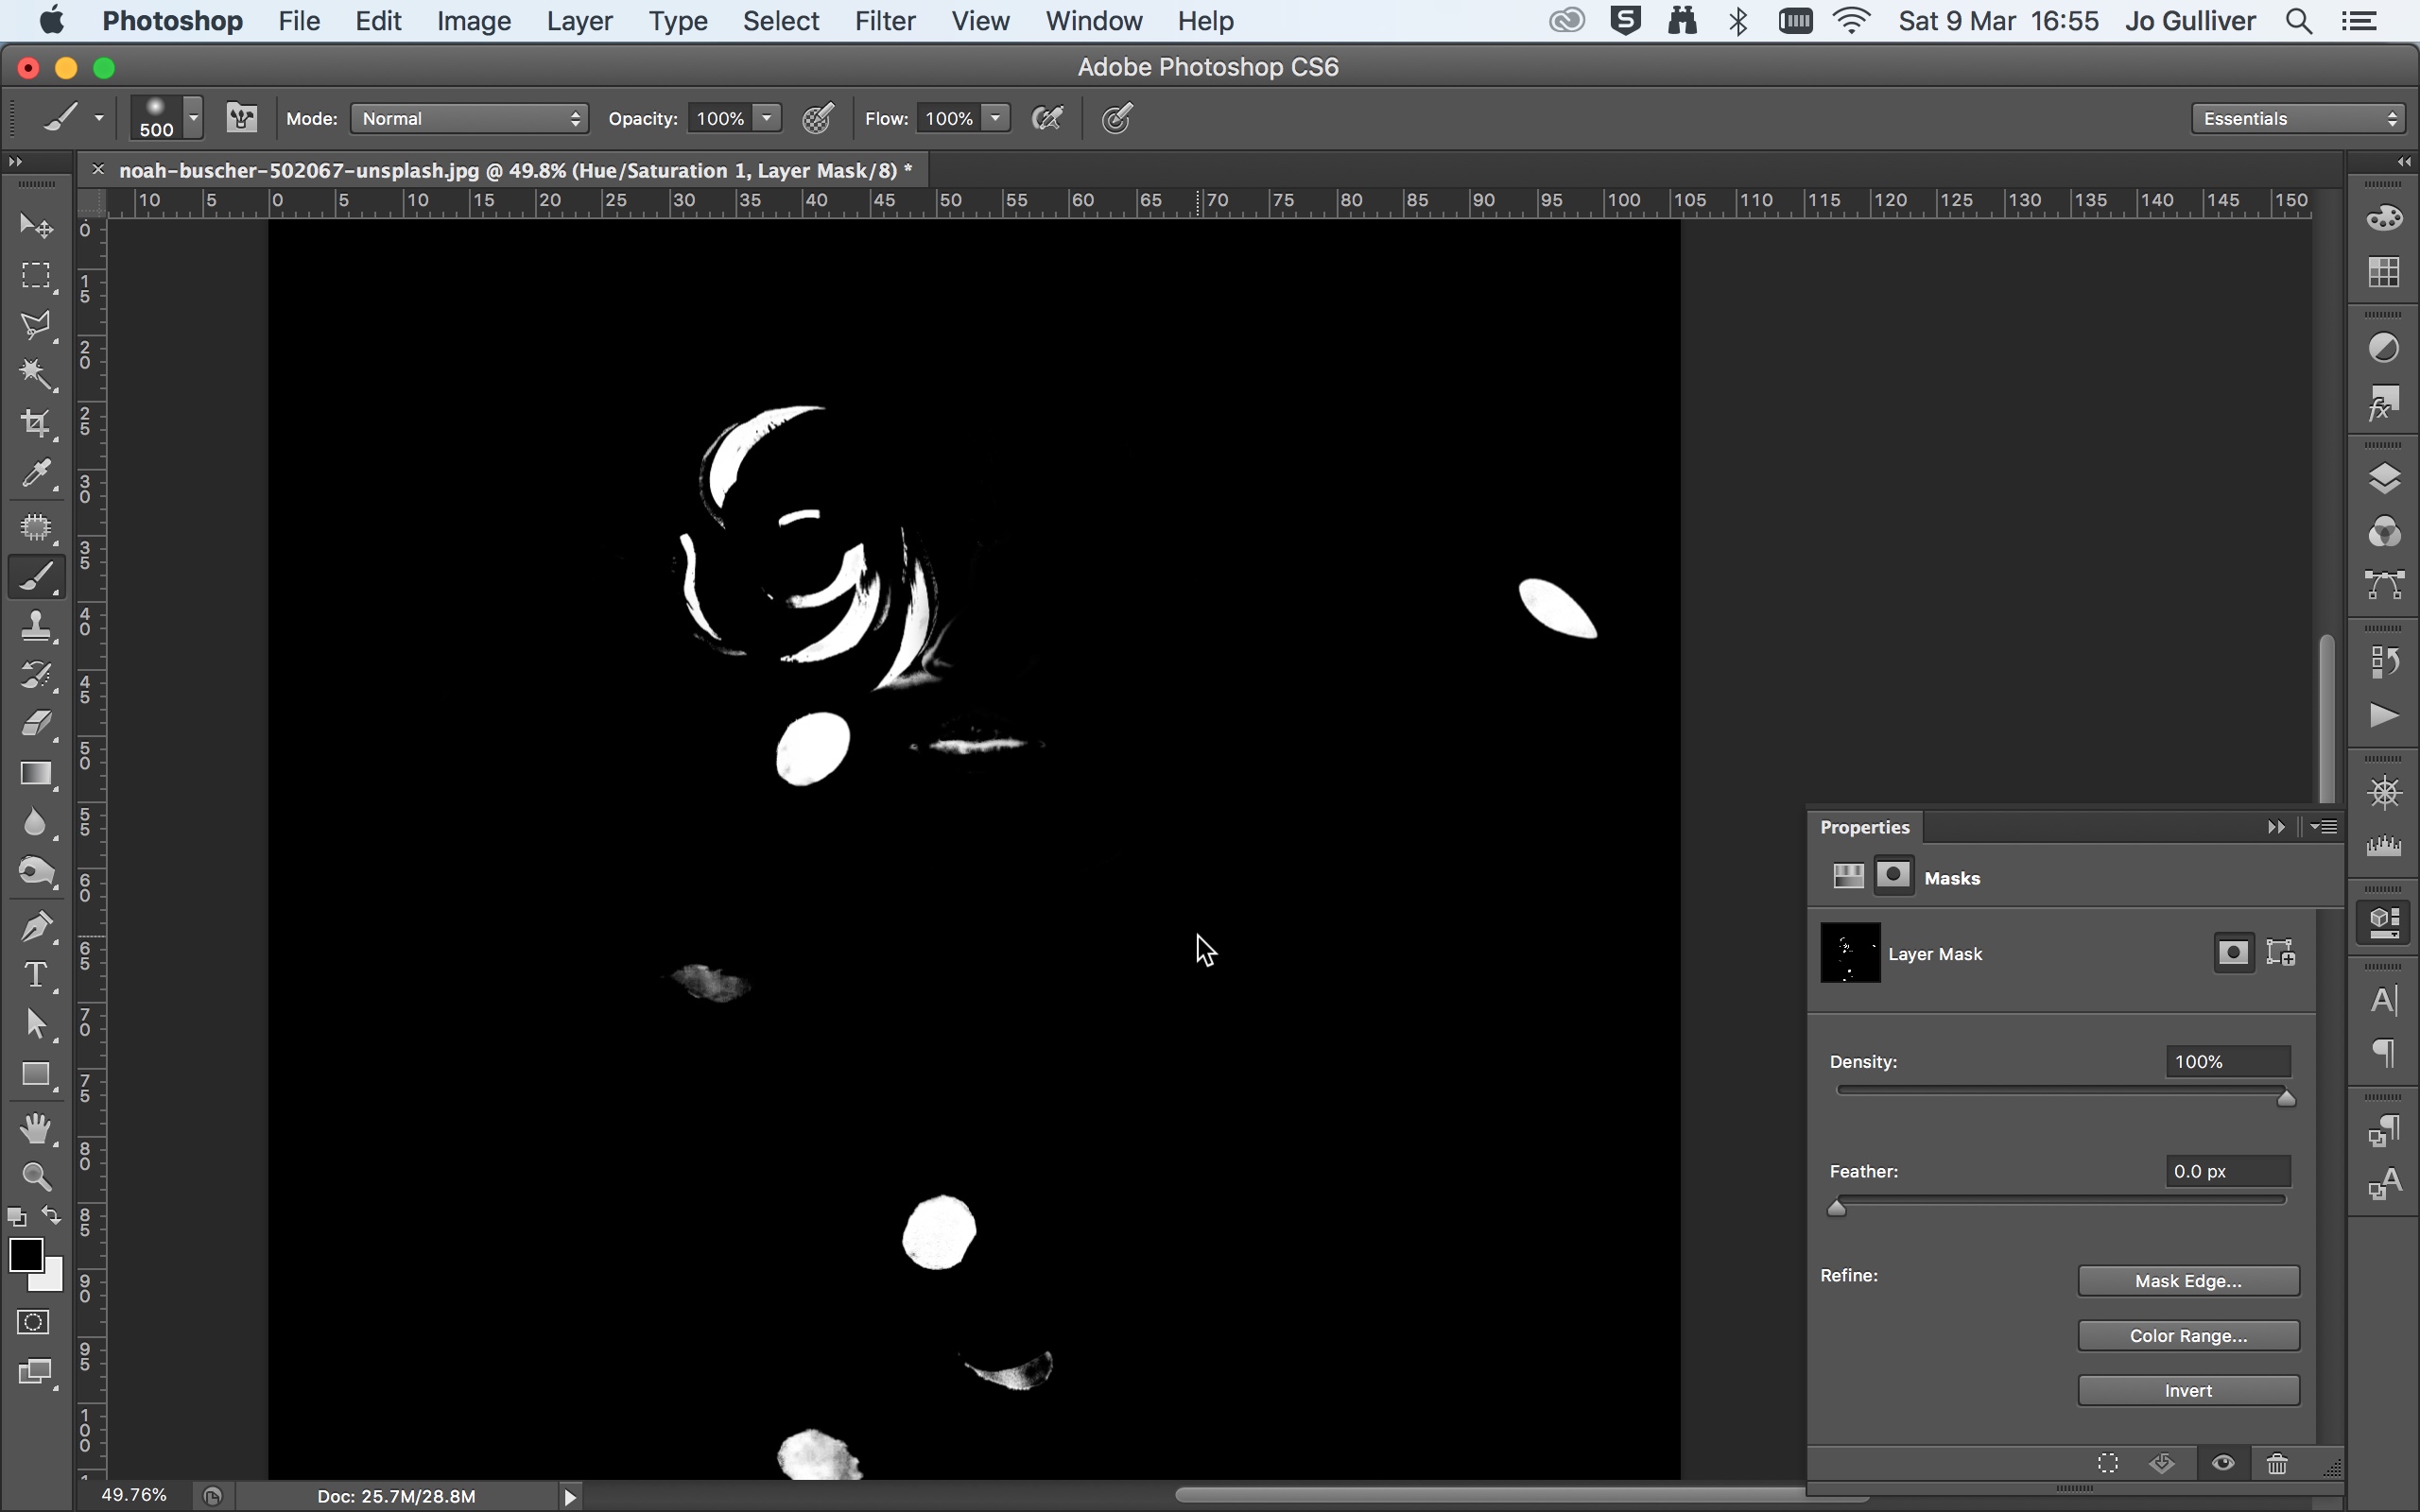
Now it's time to tidy up your selection. In the Hue/Saturation Properties panel, switch to Mask view by selecting the button at the top of the panel. alt/opt and click on the Layer Mask image and your main canvas will switch to the Mask view. Using a Brush tool, you can begin to paint out the areas you want to remove from your selection.
Switch back to the normal view to paste in those bits that the Color Range Command didn't pick up using different brush sizes. The great thing about using this technique with the Adjustment Layer is that you can easily turn the layer off, go back and make changes to selection, and make adjustments to the colour. What's more, nothing is permanent.
Color Range: Invert a selection
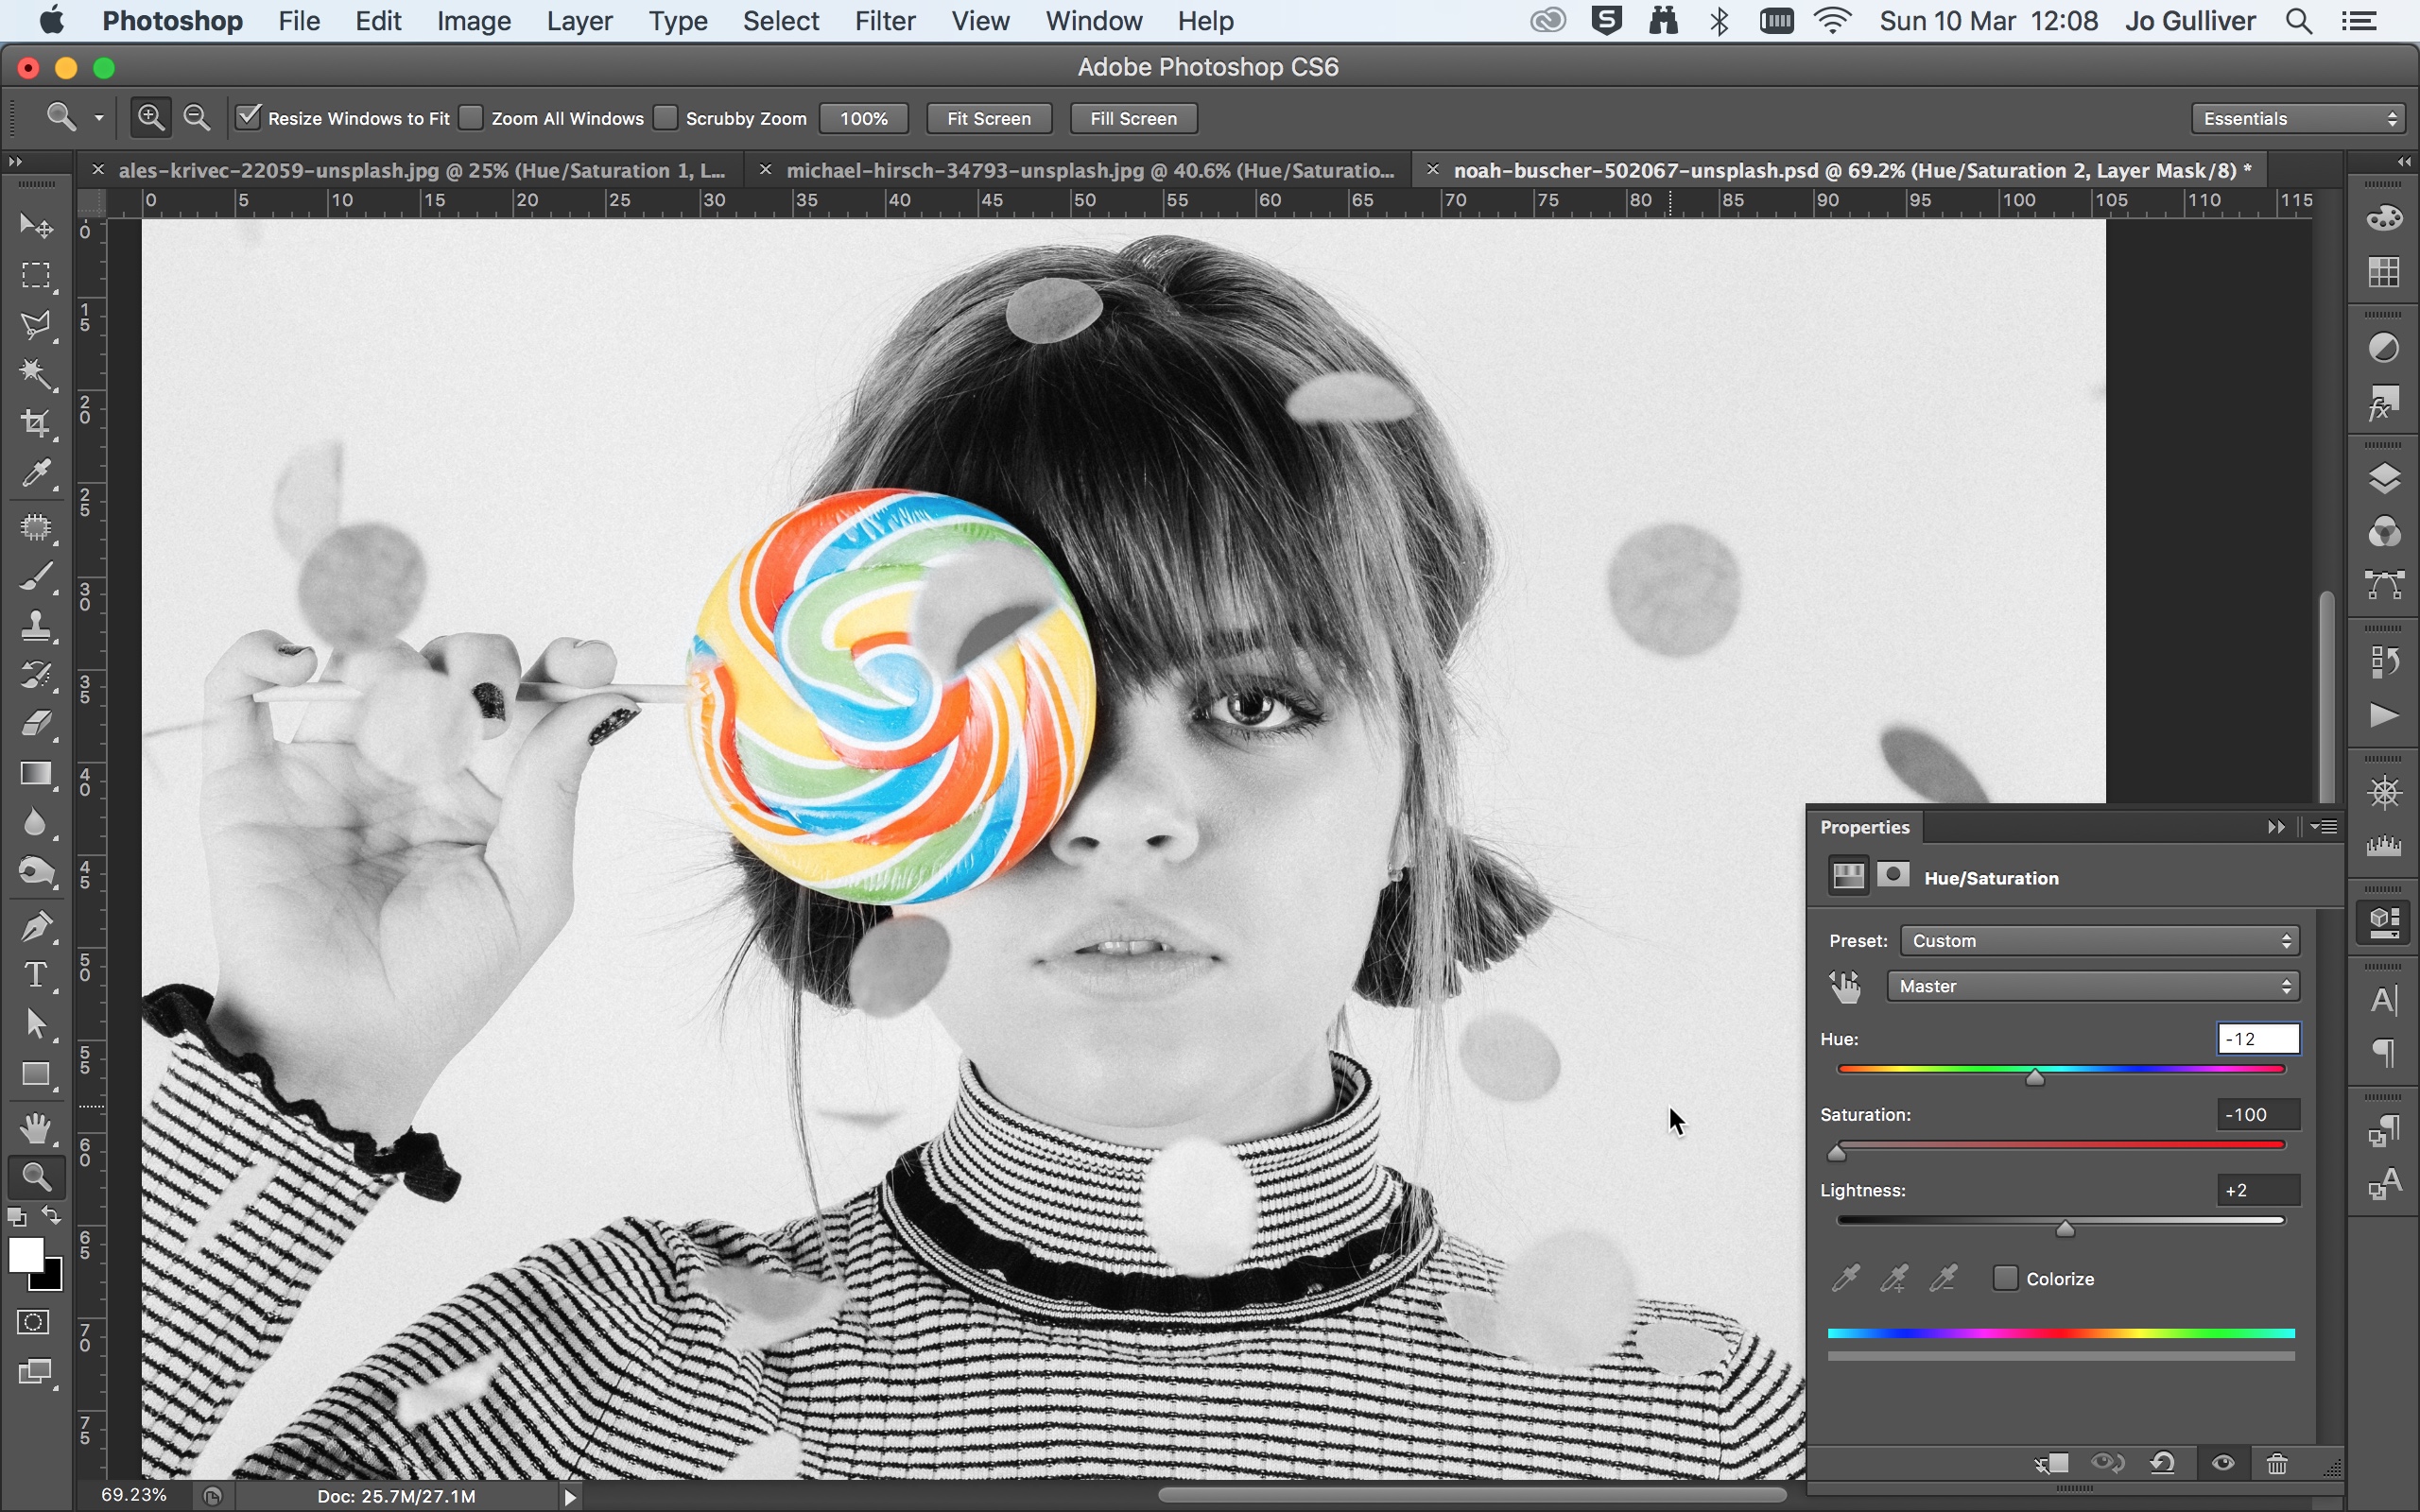
It's worth noting you also have the option to invert your selection when creating your Color Range selection. All you have to do is check the invert box. This is a great function if you want to add/maintain colour to a selected area and make the rest monochrome. You can do this by using the Black & White adjustment layer.
Alternatively, you could experiment with some of the presets in the Hue/Saturation preset drop down menu. Here you have the option of choosing effects like Sepia and Old style. On the other hand, you could use the custom option and reduce the saturation to zero to create a monochrome effect.
Related articles:
- Master the Mixer brush in Photoshop
- Photoshop CC 2019 review
- The 9 best alternatives to Photoshop
Related articles
Photoshop How To Change All Of One Color To Another
Source: https://www.creativebloq.com/how-to/photoshop-colour-change
Posted by: moorehiment.blogspot.com
0 Response to "Photoshop How To Change All Of One Color To Another"
Post a Comment